An Open Source STM32 Development System
Here’s a complete set of instructions on how to setup a simple development system that is completely open source. It uses the libopencm3 open source library.
I initially gave up on learning to use STM32 because there were so development system to choose from and setting up the open-source tools were tricky.
It’s a shame because the STM32 MCUs are extremely powerful, relatively inexpensive, and the development tools are free. For as little as $8 you can get a device programmer and a 32-bit ARM development board with USB capabilities.
The process below is more manual work than loading an expensive IDE like Keil, or Coocox, or IAR, but this teaches you the under-the-hood details and the price is great: FREE and open source.
Download and Install ARM GCC Compiler
GCC is the GNU Compiler Collection. It’s free and open source. The ARM version of the compiler is included in many Linux distributions, but a number of packages are broken. To save yourself from a lot of difficult debugging of dependency issues, download from ARM and install it yourself.
Make sure there is no other ARM compiler already installed to conflict with this installation. The command below should return nothing:
which arm-none-eabi-gcc
Download the Linux version
Download it from the ARM download page
As of this writing, the file was called gcc-arm-none-eabi-8-2019-q3-update-linux.tar.bz2 but will change with revision.
Find a good location that is in your PATH. Display your path:
env | grep PATH
For my system, /usr/bin was a good place. Switch to that directory and
unpack the file. And then rename the directory to a shorter, easier name such as
gcc-arm:
cd /usr/bin
sudo tar -xvjf ~/Downloads/gcc-arm-none-eabi-8-2019-q3-update-linux.tar.bz2
sudo mv gcc-arm-none-eabi-8-2019-q3-update/ gcc-arm/
Next, add the gcc bin directory where the actual compiler binaries are to your PATH setting:
export PATH=$PATH:/usr/bin/gcc-arm/bin
This addition in PATH will only apply to this session. To make it stick, add this
line to the .nanorc in your home directory so that it is executed each time
you open a terminal window.
Test out the compiler:
which arm-none-eabi-gcc
arm-none-eabi-gcc --version
Clone and test build libopencm3 examples
The libopencm3-examples repository is a complete structure of example programs
including the libopencm3 library itself. See the
main libopencm3 repository
for details.
Clone the libopencm3 examples repository from Github:
git clone https://github.com/libopencm3/libopencm3-examples.git
Build the libopencm3 library
Next, we build the library:
cd libopencm3-examples/libopencm3
make
This make take several minutes because the library is huge. This only needs to be done one time.
Build one of the test programs
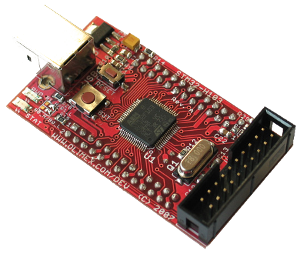
Let’s build the blinky LED example for the Olimex STM32-H103 board:
cd libopencm3-examples/examples/stm32/f1/stm32-h103/miniblink
make bin
ls -l
You should see a file called miniblink.bin. This is the binary which we will
need to program onto the MCU board.
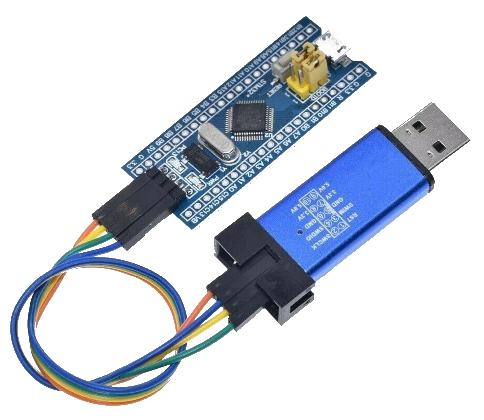
Building the st-flash utility
Next, we build the program that controls the ST-LINK V2 programmer.
The complete instructions are at https://github.com/texane/stlink/blob/master/doc/compiling.md
Note: You defninitely need libusb-1.0-0-dev, not just libusb-1.0-0 to let the make/build work on Debian Linux (such as Ubuntu).
First, install dependencies that the program needs:
sudo apt install build-essential
sudo apt install libusb-1.0-0-dev
sudo apt install cmake
Clone repository and run make:
git clone https://github.com/texane/stlink
cd stlink
make clean
make release
Install it system-wide using the install script:
cd build/Release
sudo make install
This should also update the udev/rules.d folder to add the ST-LINK V2 device.
ls /etc/udev/rules.d/
There should be several rules for different versions of the ST-LINK programmer. Test the programs for flashing and getting device info:
Update the dynamic library cache
sudo ldconfig
Test out the installation:
st-flash --version
st-info --version
Test out the programmer hardware. Connect just the programmer to USB and test it:
st-info --probe
It should say Found 1 stlink programmers.
Connect it to an MCU board and make sure the programmer source power or the board is powered. It should report:
$ st-info --probe
Found 1 stlink programmers
 serial: 563f7006497553553715183f
openocd: "\x56\x3f\x70\x06\x49\x75\x53\x55\x37\x15\x18\x3f"
  flash: 131072 (pagesize: 1024)
   sram: 20480
 chipid: 0x0410
  descr: F1 Medium-density device
Program the MCU dev board
You program an STM32F103 using the st-flash command like this:
st-flash write miniblink.bin 0x8000000
This writes the binary starting at 0x8000000, the address where flash memory starts.
When the program finishes, the LED on the board should begin to blink.
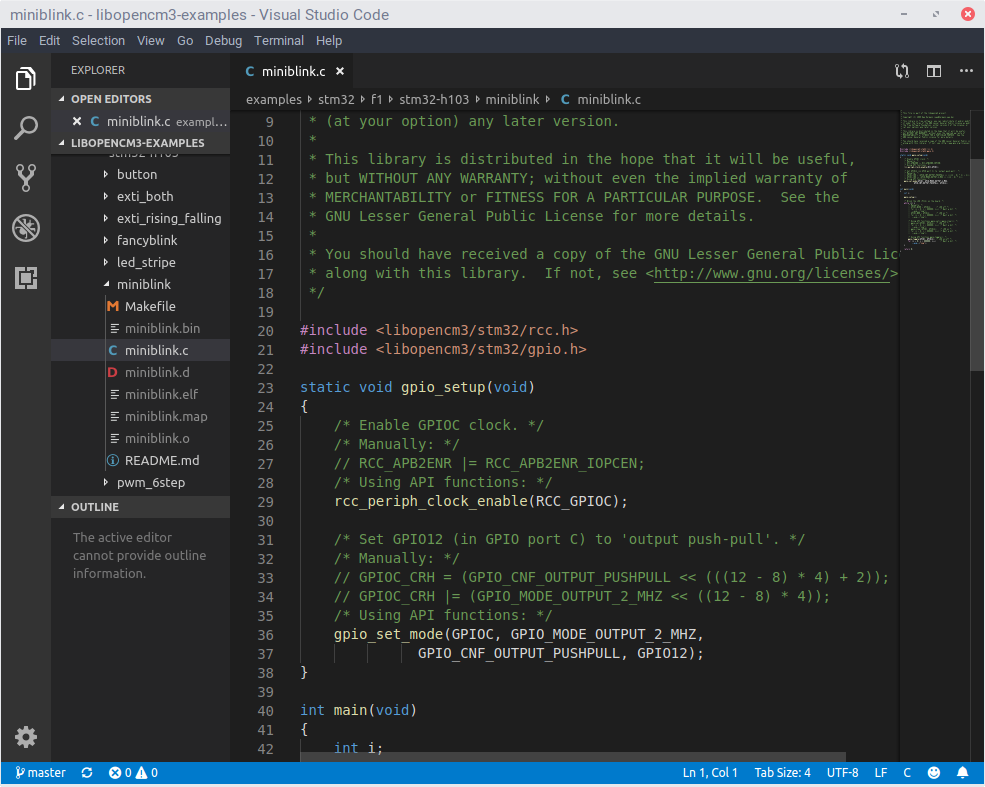
Integrated Development Environment
My preferred development environment is Visual Studio Code aka VSCode. I used to use PyCharm for Python, but VSCode lets me use one tool to do both Python and C code. It’s another free, open source SW.
Comments