Hummicam, Raspberry Pi wildlife camera
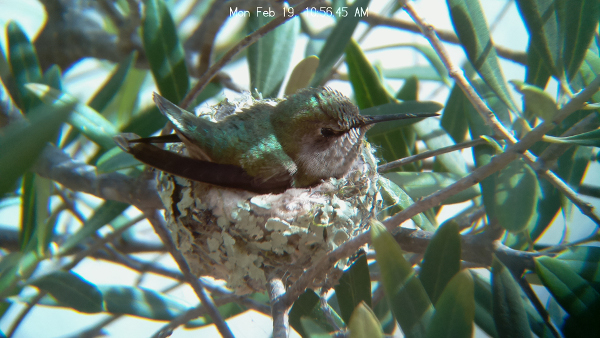
A hummingbird decided to nest in our potted olive tree so, of course, I had to scour the web to see if I could make a wildlife camera using my favorite single-board computer, the $10 Raspberry Pi Zero W. The result was fantastic!
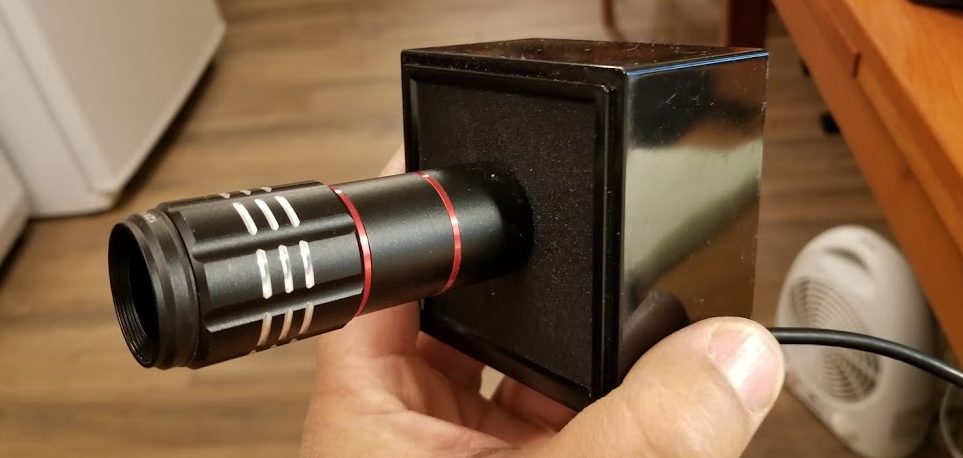
I found this guy’s webpage which had a fantastic idea of mating an inexpensive clip-on telephoto lens to a Raspberry Pi camera sensor. I decided to replicate his work.
The result was impressive. Ok, it’s definitly not National Geographic quality, and the photographers will whine about horrible chromatic aberration, but it is damn awesome for a $12 lens hacked on to a $20 camera running on a $10 Linux computer with wifi in a $1.50 plastic teacup!
The Results
The results are fantastic for very low budget gear!
The Hardware
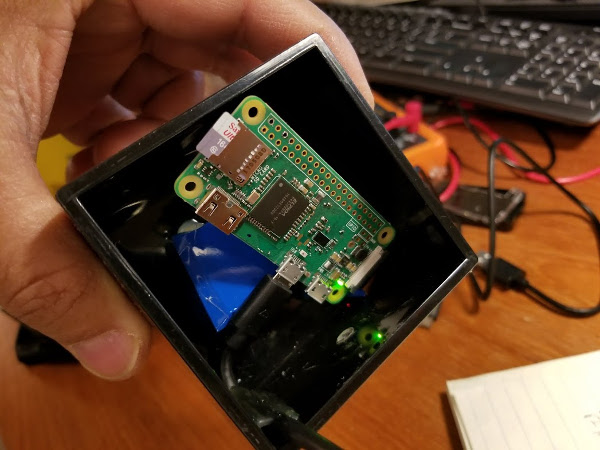
- Raspberry Pi Zero W (W has wifi)
- 16 GB SD card
- Raspberry Pi 5 MP camera for Zero (different version than Pi 3)
- Phone USB charger – a crappy 500 mA one works just fine
- USB-to-micro-B cable
- Clip-on telephoto for cell phone from Pimoroni
The camera is made specifically for the Pi Zero which has a smaller connector than the RPi3. The telephoto is the same one from Pimoroni the other guy used from the UK. I’m sure other brands and types will work just fine.
For power, the Pi Zero W is much lower power (and slower) than the RPi3 so it is happy with a 500 mA adapter.
The Software
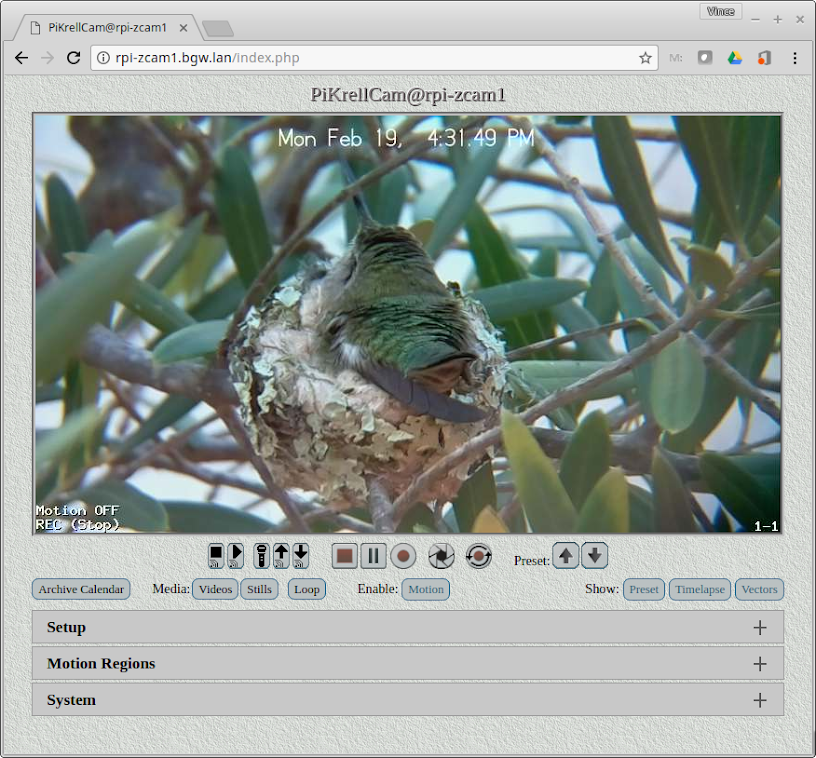
PiKrellCam is the software I used to control the camera. The cool thing is that it runs a web server. All you have to do is http:// to the IP of your Pi Zero and you get this screen for full control of the camera.
Installation
git clone https://github.com/billw2/pikrellcam
cd pikrellcam
./install-pikrellcam.sh
You can shoot stills and video, adjust settings, download the files, reboot the Pi, all via the web interface.
PiKrellCamm big feature is motion triggering, but I found it useless because the SW would false trigger constantly because of the wind swaying the tree.
One odd observation is that the camera’s white balance seems wrong. When set to “sunlight”, “shade” or “cloudy” settings, the image is very yellow. I had to set it to “incandescent” to get more correct looking colors.
USB Serial Gadget
Once the enclosure is sealed up, getting to the SD card to change wifi settings will be impossible. That’s where the USB Serial Gadget mode comes in.
The Raspberry Pi Zero (and the Zero W) support special USB OTG modes which the RPi3 does not. Your Zero can be a USB serial device through which you can get to the console and files without using a special UART cable.
The best instructions I found here show you how to configure everything via the files on the SD card. There’s no need to ever attach a keyboard and monitor.
Here’s the gist: you have the OS load the USB driver called dwc2 at boot, enable it, and connect the console to this USB driver.
In /boot/config.txt add this line towards the end:
dtoverlay=dwc2
In /boot/cmdline.txt add “modules-load=dwc2,g_serial” just after “rootwait”. This will all be in one long line.
cd to /etc/systemd/system/getty.target.wants directory and create this symlink to redirect the console to ttyGS0.
ln -s /lib/systemd/system/getty@.service getty@ttyGS0.service
The Build
I found a square plastic tea cup for $1.50 at a local discount shop and put that to service.
The lens has a threaded base. I drilled a very large hole with a step drill bit, being careful to drill it just a tiny bit smaller than the lens threads. After some careful twisting I got the lens to thread into the hole without having to tap threads.
Mounting the camera sensor was the hardest part. I did not get good pictures of it but basically the camera has to be about 10 cm from the base of the lens. I mounted the camera(which comes with a sticky back side) on a rectangular aluminum plate and put a stack of 8 double-sided foam tape (the thick kind) to get it at the right distance from the lens. Finding the optical center took a lot of trial and error. I’ll fabricate something better for the next build or find someone to 3D print something for me.
I drilled and tapped a standard 1/4”-20 threaded hole into the bottom to attach the box to a camera tripod. The USB cable is just hot-glued to the corner of the case.
The back is completely open so I just took a lot of camouflage duct tape and completely covered the box to help seal it from water since this will sit outdoors continuously operating for a month or more.
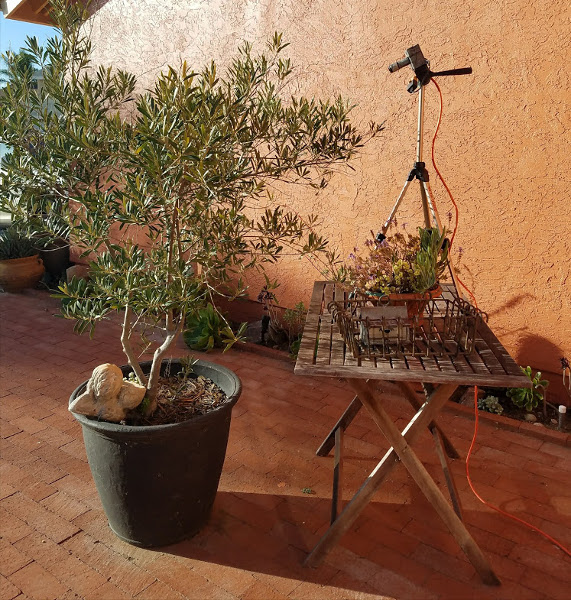
Outdoor Placement
Anna’s Hummingbirds are very well adjusted to city life and are thus not spooked by weird man-made contraptions like my lousy camera setup. For more skittish birds and animals, more effective camouflage will probably be in order.
Comments